Monday, September 26, 2016

DIY Fabric Book Covers Under Construction part 2


Just thought you would like to see the next batch of book covers "in the works" part 2.    

To See Part 1 go here - DIY Fabric Book Covers Under Construction.

The picture shows cover pieces, inside front and back panels, and pockets that have been cut out, marked with sewing lines, and pinned together.

Here's a run down on what it takes for this 2nd phase of making  fabric book covers.

  1. Mark the pieces for a 1/4 inch seam. The seam marking is on the front and the back inside panels on the back of the fabric
  2. For the pockets that will be on the inside front panel, piece together inside out and iron a top 1/4 in seam.
  3. Cut a hair elastic for each cover.
  4. Pin front panel to cover fabric  on the right hand side.  The cover fabric is  face up and and the front panel is face down.
  5. Tape hair elastic to the left side of the cover fabric, 1/2 from the top.
  6. Pin the back panel to the left hand over the hair elastic on the fabric cover. 
  7. Sew pinned panels. Double stitch over hair elastic.
  8. Fold fabric for pocket with designs to the inside. Fold down top edge 1/4 and iron.
  9.  Sew pocket along markings.
  10. Turn pocket inside out and press.
  11. Cut the extra length from the hair elastics .
  12.  Iron the sewn cover flat.
  13.  Cut ribbon that coordinates to your cover panel to length of 15-16 inches and set aside.  

Are you still with me?  LOL, even I'm lost at this phase.  But I've made over 100 fabric book covers and can to all phases blindfolded,


Monday, September 19, 2016

DIY Fabric Book Covers Under Construction


Just thought you would like to see the next batch of book covers "in the works".  

Working on : Pokemon, Dr. Who, Chicago Blackhawks, and Guardians of the Galaxy.

The picture shows cover pieces, inside front and back panels, and pockets that have been cut out.

Here's a run down on what it takes for this 1st phase of making  fabric book covers.
  1. Select the best image from your fabric and center it.  I have a temp plate created for both the spiral and the composition book sizes.  A crossbar marks the center of the temp plate, so I just draw around the temp plate once I have the best part of the design.
  2. Cut out the traced patterns.
  3. Trace and cut out the side panels.  I usually cut the front panel from a solid color and the back panel is from the cover fabric.  Again,  I have a temp plate for this.
  4. Trace and cut out an image from the cover fabric to make a pocket.  Again, I have a temp plate for this.  

Monday, September 12, 2016

10th Annual Autumn Colors Craft Show in Romeoville IL

Check the below for my first show of the Fall-Christmas Season

10th Annual Autumn Colors Craft Show
Saturday, October 1, 2016
9AM-3PM
Romeoville Parks and RecreationCenter
900 W. Romeo Rd
Romeoville IL 


Saturday, September 10, 2016

Pokemon - Going on to the Next Project


Well, I've just checked off another item on "da list" of crafts to make for craft fairs.

So now it's time to GO   Yes, GO  onto the next project.

The next project is sewing some reusable fabric book covers for spiral and composition notebooks.  

An since I'm GOING  ahead, I'll start with this fabric below.


Friday, September 9, 2016

Cute Critter Keyboard Wrist Rests


 I have another item checked off  "da list".  

And these items were as fun as well as something that can be put to good use.

I completed sewing up some Computer Keyboard wrist rests. 

So if you're a keying junkie, that is,  a old school person using a keyboard instead of a touch screen.  you just might like these.   

And they might just be the key to help prevent some carpel tunnel problems. 

Key down to see the critters.


Tuesday, August 16, 2016

Free Standing Lace Ornaments- My New Batch


Just finishing up the latest batch of free standing lace ornaments.  

And got a thing checked off on "da list" of up coming projects.

The best part of the making these ornaments is decorating them and deciding on what type of material to use for the hanger.  If you want to see what they look like in production go to my post about it - here .

Below are some pictures of the finished ornaments.

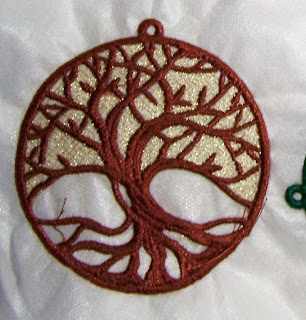
This is a gem of an ornament.  A crystal or polished quartz hangs from a suede cord over a Celtic Tree of Life.  Metallic thread "pops" the design and iron-on crystals on the tree roots finish it.


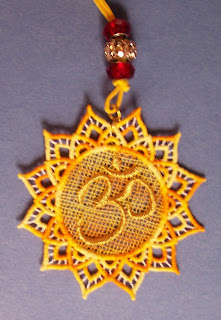
You'll be Ohing and Ohming if you have one of these.  These Ohm ornaments are stitched in yellow and white and sometimes gold metallic thread.  Beads added on a yellow, or white suede cord.


Who's Foxy?  Well this ornament is.  That's who! Coppery red and that white tail hanging from a coppery color chain, makes the foxiest ornament.


Did you see any fairies hanging around?  Well hang these ornaments and you will. Silver metallic wings, purple or pink bodies, with a purple or pink skirt, decorated with iron on crystals, and or ribbon flowers, these fairies hang on a ribbon that have some pretty beads.


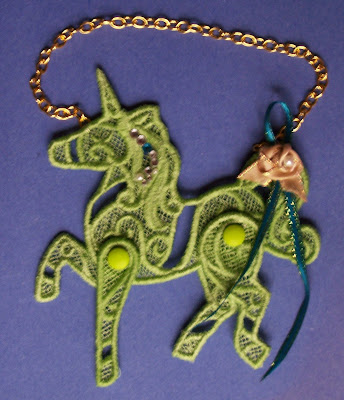
Keeping it magical, how about some Prancing Unicorns?  They prance and dance because they are decorated with iron-on crystals, ribbons, and flowers.  No two alike.   I used chain as their hangers.


Cool cats will like this ornament.  Brown and yellows multi-colored with yellow ribbons and bows, on a cord hanger.


Light as a feather, these ballerinas twirl in their dance.  Decorated with tulle and ion-on crystals on a silvery ribbon. 


Wednesday, July 27, 2016

Making Free Standing Lace Machine Embroidery Ornaments

Just doing a check in while working on "da list" of crafting for some up coming craft show.

I thought you would like to see what Free Standing Lace Machine Embroidery Ornaments look like  before I wash away the water solvable stabilizer.  


A Money Saving Tip- try to  hoop as many designs on one piece of stabilizer . Then cut around them and dissolve the stabilizer from the design. 

Another Tip - to make the designs stiffer don't wash away all of the stabilizer.  Save the water with dissolved stabilizer and put it into a spray bottle. After the designs are dry, you can spray the solution to stiffen them up more .

Below are closeups of designs.  To finish them off, I will decorate the ornaments and attach a hanger.  For the hangers I use chains, beaded ribbons, twine, or suede.  And some designs have to be have to be assembled first- like adding legs to the body of the foxes and the skirts to the fairies.  I have made ballerinas (not pictured).  These are the newest additions to my "Any Time " Ornaments.